前言
Bean的加载过程算是面试中的老生常谈了,今天我们就来从源码层面深入去了解一下Spring中是如何进行Bean的加载的
Spring
先看示例代码:
public static void main(String[] args) {
        ApplicationContext context = new ClassPathXmlApplicationContext("classpath:/spring/text.xml");
        System.out.println(context.getBean("stringutil"));
    }
我们就从这个getBean去探索Spring如何进行类的加载。
首先我们先看看ClassPathXmlApplicationContex的继承关系:
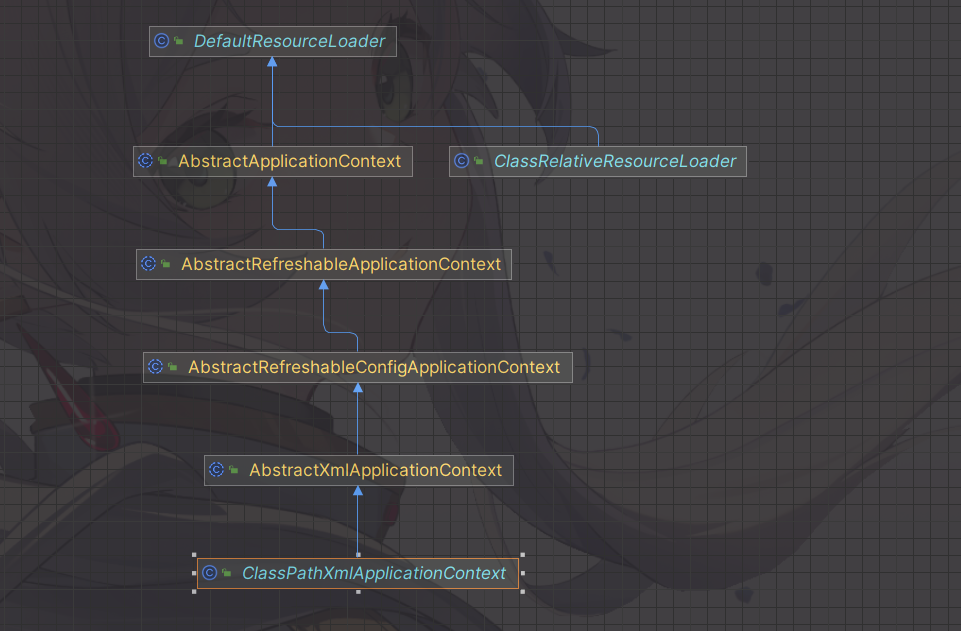
而DefaultResourceLoader又是实现的ResourceLoader接口
我们通过不断去溯源new ClassPathXmlApplicationContext这个构造方法
我们先通过super一直溯源到最后
我们再来看看setParent的源码: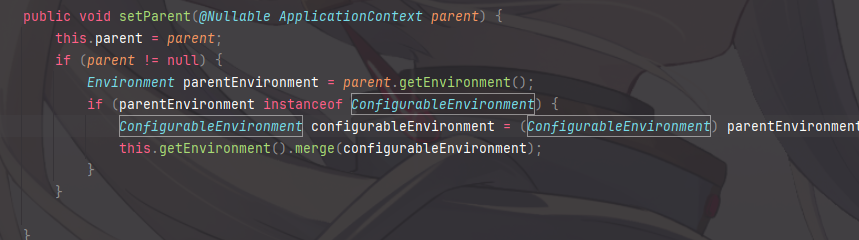
发现这里仅仅是给ApplicationContex设设置上下文。
所以真正的重点还是上面的refresh那里。
refresh
先看源码,源码有点长,但是我加了注解,请慢慢看,我会在里面进行一些分析的
public void refresh() throws BeansException, IllegalStateException {
synchronized (this.startupShutdownMonitor) {
// refresh的前置准备,比如设置startTime,开启激活状态、关闭close状态等等等
prepareRefresh();
//告诉子类去刷新内容Bean工厂(从类图中可以明显看出来入口类实例也是个bean工厂)
// 观察和刷新BeanFactory
ConfigurableListableBeanFactory beanFactory = obtainFreshBeanFactory();
//提前设置一些在该context中使用的属性,比如Classloader、Callback、environment等
prepareBeanFactory(beanFactory);
try {
// 通知context子类,后置处理beanFactory。比如用一系列的Webcontext子类
postProcessBeanFactory(beanFactory);
// 将BeanFactoryPostProcessor在当前Context中注册为Bean
invokeBeanFactoryPostProcessors(beanFactory);
// 注册BeanPostProcessor来拦截Bean创建的后置处理。
registerBeanPostProcessors(beanFactory);
// 为当前Context初始化MessageSource
initMessageSource();
// 为当前context初始化应用事件广播
initApplicationEventMulticaster();
// 初始化其他特殊的bean对象 比如webcontext
onRefresh();
// 检查监听Bean 并发布他们(ApplicationListener)
registerListeners();
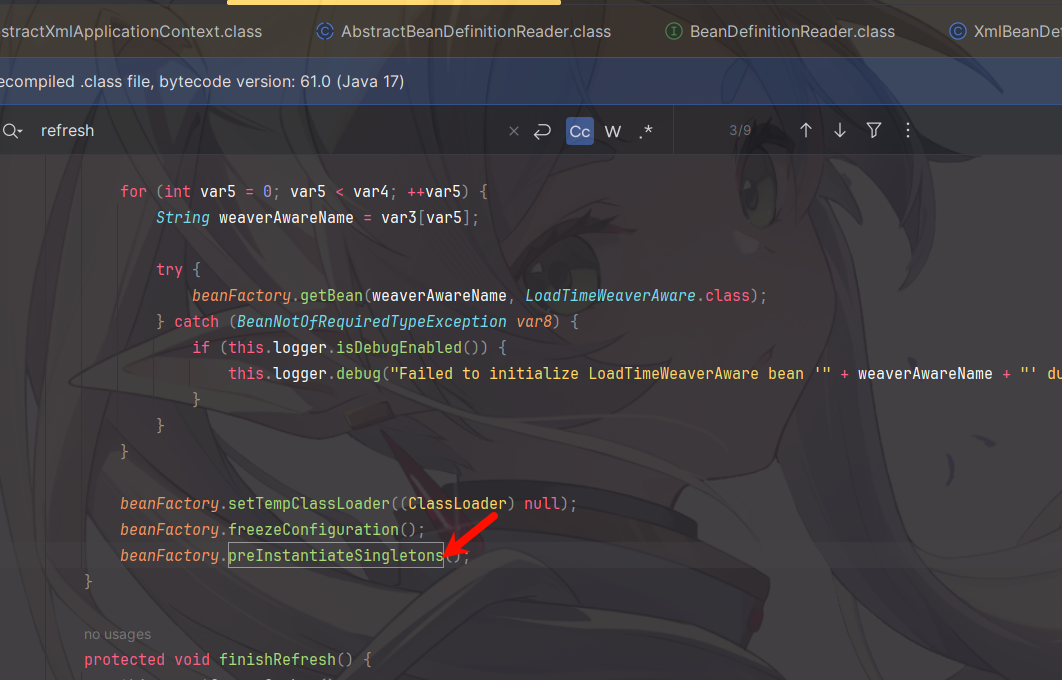
// 实例化BeanFactory中所有的其他的单例对象集合(非延迟的)
finishBeanFactoryInitialization(beanFactory);
// 最后发布LifecycleProcessor和ContextRefreshedEvent事件
finishRefresh();
}
catch (BeansException ex) {
if (logger.isWarnEnabled()) {
logger.warn("Exception encountered during context initialization - " +
"cancelling refresh attempt: " + ex);
}
// 失败销毁bean
destroyBeans();
// Reset 'active' flag.
cancelRefresh(ex);
// Propagate exception to caller.
throw ex;
}
finally {
// Reset common introspection caches in Spring's core, since we
// might not ever need metadata for singleton beans anymore...
resetCommonCaches();
}
}
}简单总结一下就是刷新Spring应用的上下文,确保所有的Bean和相关组件都被正确初始化和配置。
BeanFactory
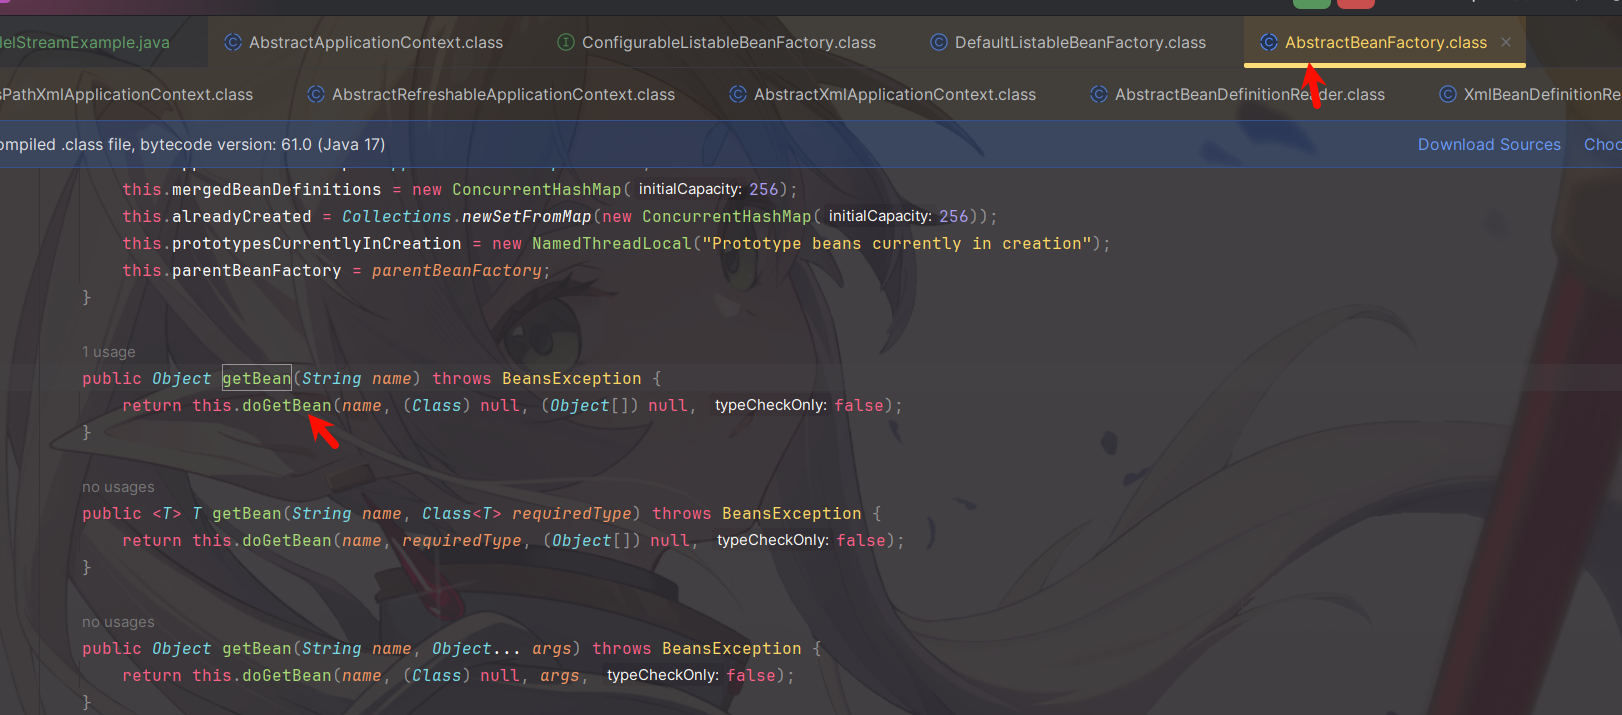
我们顺着getBean去看源码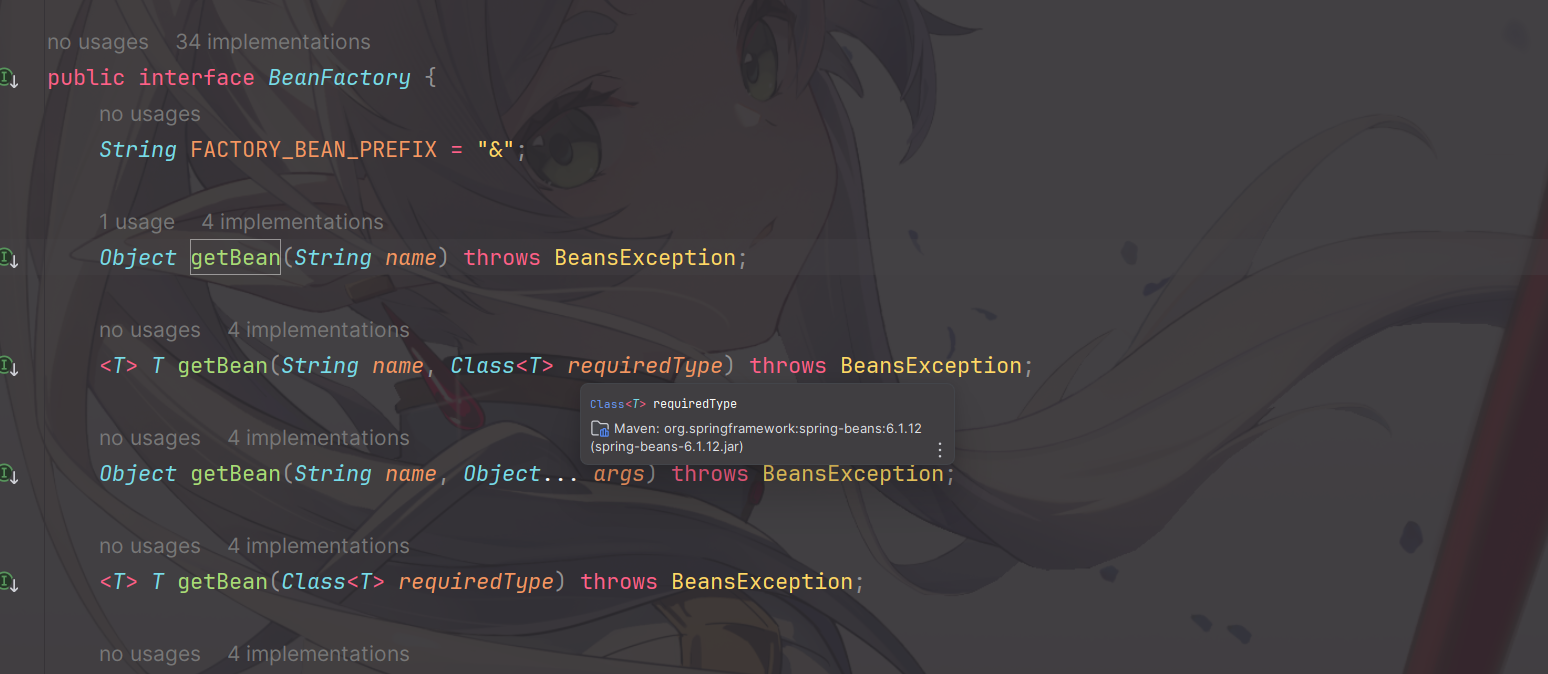
BeanFacoty是用来加载Bean的重要接口,那么我们这里的实现类在哪呢?
让我们接着debug进去看看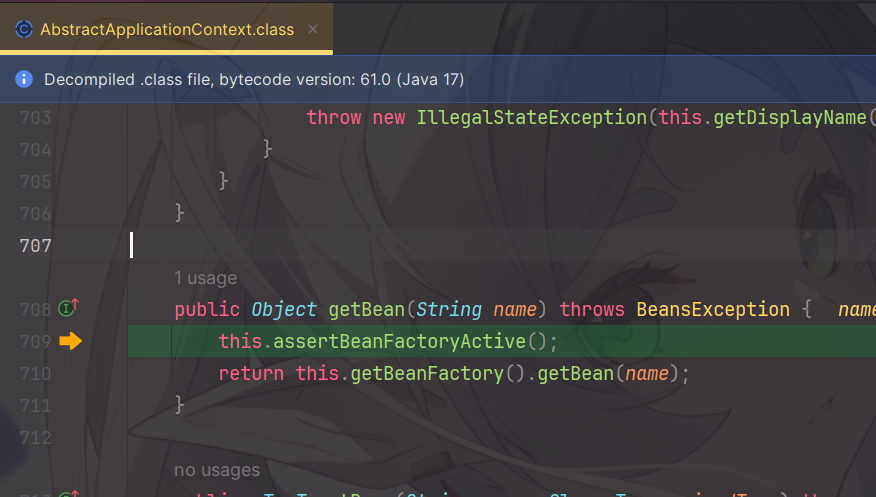
为什么来到这里了呢?让我们看看AbstractApplicationContext的类关系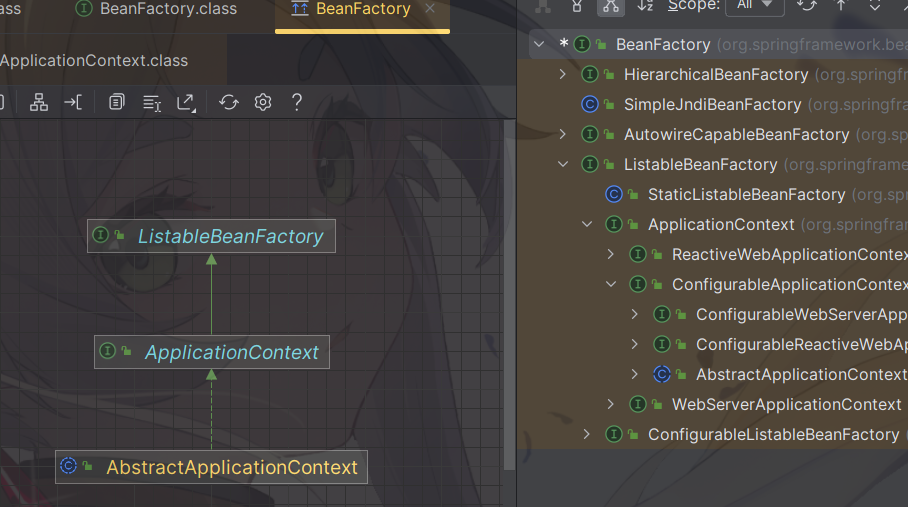
原来如此,我们最终还是要在AbstractApplicationContext里面去实现getBean的。
接着我们来看看这个BeanFactory是如何出现的,关注到上面的refresh源码中的这一行
以下是源码:
protected ConfigurableListableBeanFactory obtainFreshBeanFactory() {
        this.refreshBeanFactory();
        return this.getBeanFactory();
}
看来重点在refreshBeanFactory()
    protected final void refreshBeanFactory() throws BeansException {
        // 如果又beanFactory了,就销毁bean关闭beanFactory
        if (this.hasBeanFactory()) {
            this.destroyBeans();
            this.closeBeanFactory();
        }

        try {
	        // 创建 DefaultListableBeanFactory
            DefaultListableBeanFactory beanFactory = this.createBeanFactory();
            beanFactory.setSerializationId(this.getId());
            beanFactory.setApplicationStartup(this.getApplicationStartup());
            this.customizeBeanFactory(beanFactory);
            // 加载BeanDefinition,在这里是解析XML中的Bean标签,并装载到BeanDefinition中
            this.loadBeanDefinitions(beanFactory);
            // 将加载号的beanFactory赋值给Context
            this.beanFactory = beanFactory;
        } catch (IOException var2) {
            throw new ApplicationContextException("I/O error parsing bean definition source for " + this.getDisplayName(), var2);
        }
    }

protected DefaultListableBeanFactory createBeanFactory() {
	return new DefaultListableBeanFactory(this.getInternalParentBeanFactory());
}
而这个DefaultListableBeanFactory实际上也是BeanFactory的另一个实现
我们顺着loadBeanDefinitions去看,发现在我们的xml加载例子中,我们进入了这个类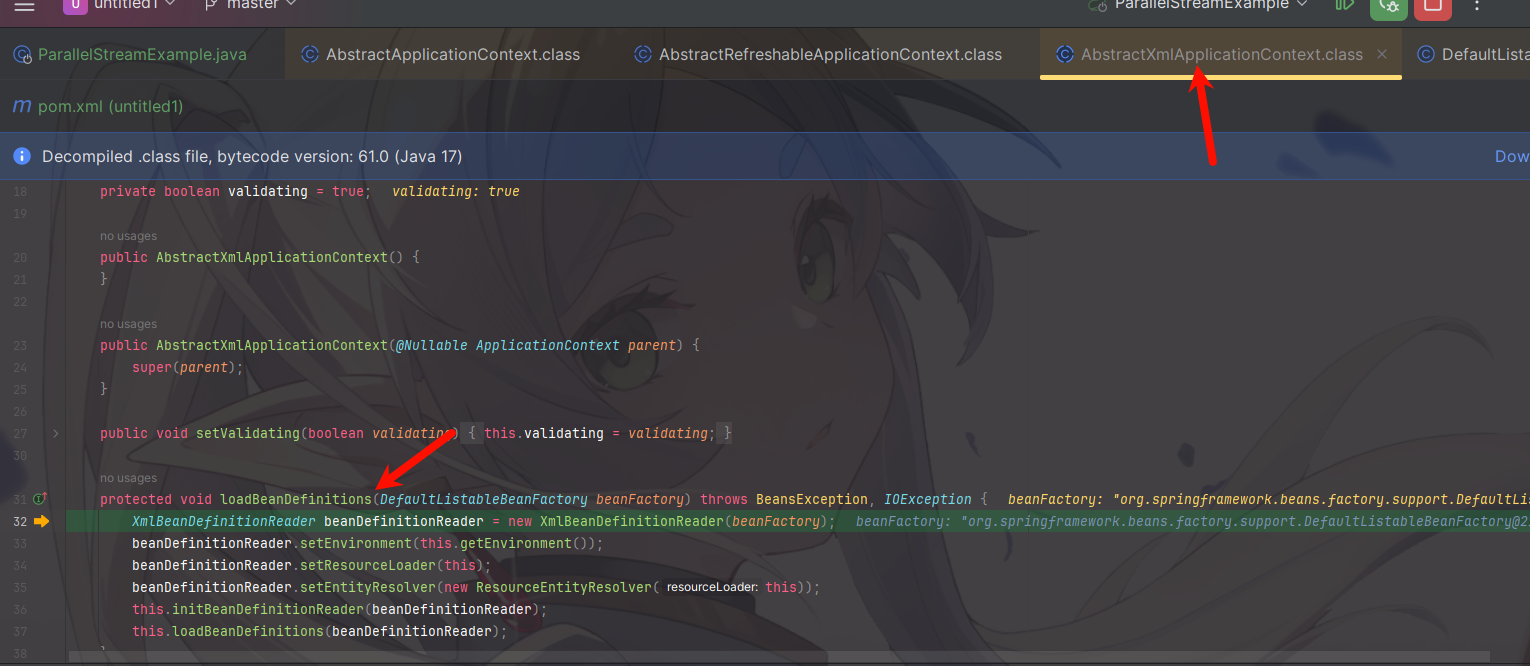
让我研究研究这个源码
protected void loadBeanDefinitions(DefaultListableBeanFactory beanFactory) throws BeansException, IOException {
	// 使用给定的beanFactory来创建XmlBeanDefinitionReader实例
       XmlBeanDefinitionReader beanDefinitionReader = new XmlBeanDefinitionReader(beanFactory);
       beanDefinitionReader.setEnvironment(this.getEnvironment());
	// ClassPathXmlApplicationContext也是一个ResouceLoader
       beanDefinitionReader.setResourceLoader(this);
       beanDefinitionReader.setEntityResolver(new ResourceEntityResolver(this));
       this.initBeanDefinitionReader(beanDefinitionReader);
       // 使用XmlBeanDefinitionReader来解析生成Bean
       this.loadBeanDefinitions(beanDefinitionReader);
   }
对这个XmlBeanDefinitionReader,我们可以看见他是这样的继承关系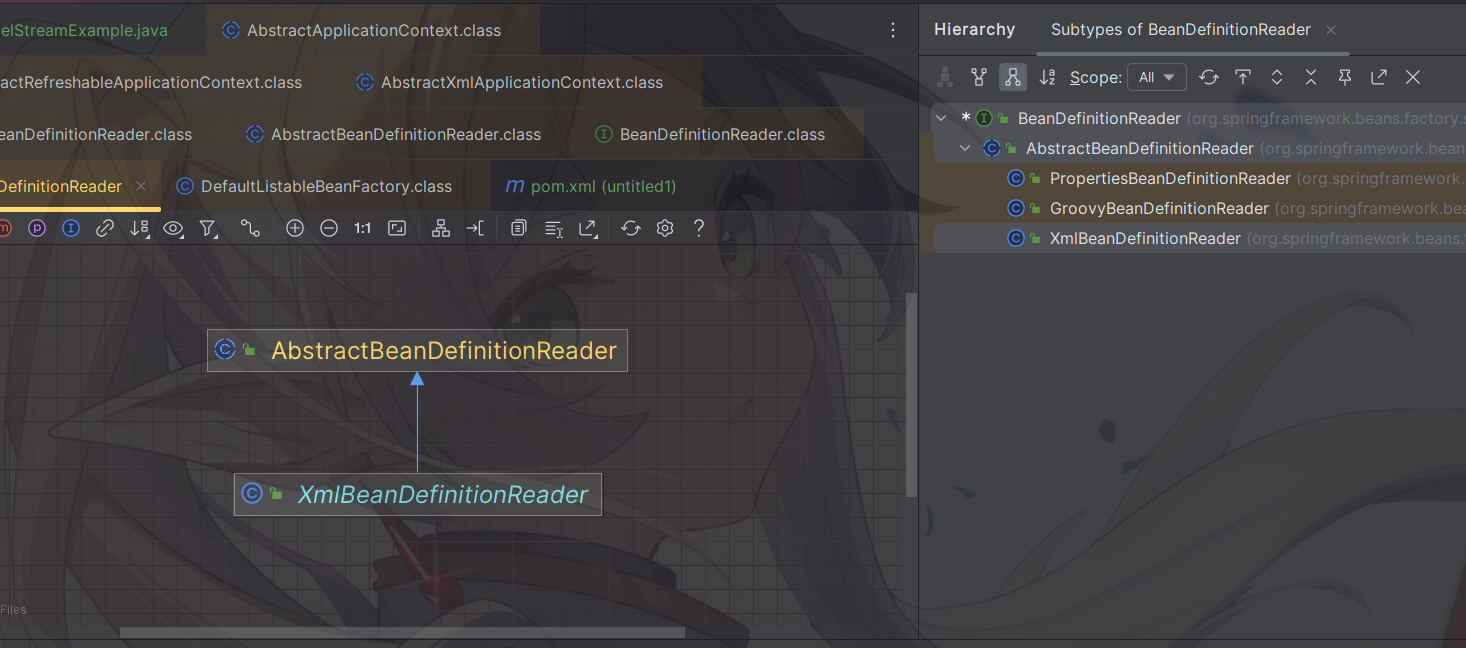
从右边可以看见,还有着Groovy和Properties两种实现,不过我们不在意他们的实现,接着我们关注到this.loadBeanDefinitions(beanDefinitionReader);这一行,我们debug进去
protected void loadBeanDefinitions(XmlBeanDefinitionReader reader) throws BeansException, IOException {
       Resource[] configResources = this.getConfigResources();
       if (configResources != null) {
           reader.loadBeanDefinitions(configResources);
       }

       String[] configLocations = this.getConfigLocations();
       if (configLocations != null) {
           reader.loadBeanDefinitions(configLocations);
       }

   }
接着让我们进入loadBeanDefinitons这个方法中
public int loadBeanDefinitions(String... locations) throws BeanDefinitionStoreException {
        Assert.notNull(locations, "Location array must not be null");
        int count = 0;
        String[] var3 = locations;
        int var4 = locations.length;

        for(int var5 = 0; var5 < var4; ++var5) {
            String location = var3[var5];
            count += this.loadBeanDefinitions(location);
        }

        return count;
}
// 接着上文
public int loadBeanDefinitions(String location) throws BeanDefinitionStoreException {
    return this.loadBeanDefinitions(location, (Set)null);
}
// 最终的实现
public int loadBeanDefinitions(String location, @Nullable Set<Resource> actualResources) throws BeanDefinitionStoreException {
    // 获取资源加载器
    ResourceLoader resourceLoader = this.getResourceLoader();
    // 上文中我们已经DefaultResrouceLoader实例记载进去了,所以这里走else
    if (resourceLoader == null) {
        // 如果资源加载器为空,抛出异常
        throw new BeanDefinitionStoreException("Cannot load bean definitions from location [" + location + "]: no ResourceLoader available");
    } else {
        int count;
        // 如果资源加载器是 ResourcePatternResolver 的实例
        if (resourceLoader instanceof ResourcePatternResolver) {
            ResourcePatternResolver resourcePatternResolver = (ResourcePatternResolver)resourceLoader;

            try {
                // 获取资源数组
                Resource[] resources = resourcePatternResolver.getResources(location);
                // 加载 Bean 定义
                count = this.loadBeanDefinitions(resources);
                if (actualResources != null) {
                    // 如果实际资源集合不为空,将资源添加到集合中
                    Collections.addAll(actualResources, resources);
                }

                // 如果日志级别为 TRACE,记录日志
                if (this.logger.isTraceEnabled()) {
                    this.logger.trace("Loaded " + count + " bean definitions from location pattern [" + location + "]");
                }

                return count;
            } catch (IOException var7) {
                // 捕获 IO 异常并抛出 BeanDefinitionStoreException
                throw new BeanDefinitionStoreException("Could not resolve bean definition resource pattern [" + location + "]", var7);
            }
        } else {
            // 如果资源加载器不是 ResourcePatternResolver 的实例
            Resource resource = resourceLoader.getResource(location);
            // 加载单个资源的 Bean 定义
            count = this.loadBeanDefinitions((Resource)resource);
            if (actualResources != null) {
                // 如果实际资源集合不为空,将资源添加到集合中
                actualResources.add(resource);
            }

            // 如果日志级别为 TRACE,记录日志
            if (this.logger.isTraceEnabled()) {
                this.logger.trace("Loaded " + count + " bean definitions from location [" + location + "]");
            }

            return count;
        }
    }
}
我们接着追踪loadBeanDefinitions,最终在XmlBeanDefinitionReader中找到答案:
public int loadBeanDefinitions(Resource resource) throws BeanDefinitionStoreException {
        return this.loadBeanDefinitions(new EncodedResource(resource));
}
// 接上
public int loadBeanDefinitions(EncodedResource encodedResource) throws BeanDefinitionStoreException {
        Assert.notNull(encodedResource, "EncodedResource must not be null");
        if (this.logger.isTraceEnabled()) {
            this.logger.trace("Loading XML bean definitions from " + encodedResource);
        }
	public int loadBeanDefinitions(Resource resource) throws BeanDefinitionStoreException {
		return loadBeanDefinitions(new EncodedResource(resource));
	}

	public int loadBeanDefinitions(EncodedResource encodedResource) throws BeanDefinitionStoreException {
		//... 省略代码
		try {
			// 前边我们传入的test.xml的输入流
			InputStream inputStream = encodedResource.getResource().getInputStream();
			try {
				InputSource inputSource = new InputSource(inputStream);
				if (encodedResource.getEncoding() != null) {
					inputSource.setEncoding(encodedResource.getEncoding());
				}
				//真正的从xml中load bean definition
				return doLoadBeanDefinitions(inputSource, encodedResource.getResource());
			}
			finally {
				inputStream.close();
			}
		}
		catch (IOException ex) {

		}
	}

// 接上
protected int doLoadBeanDefinitions(InputSource inputSource, Resource resource)
			throws BeanDefinitionStoreException {
		try {
			// 解析xml文件为Document
			Document doc = doLoadDocument(inputSource, resource);
			return registerBeanDefinitions(doc, resource);
		}
		catch (BeanDefinitionStoreException ex) {
			// 省略代码
		}
	}
// 接上
	public int registerBeanDefinitions(Document doc, Resource resource) throws BeanDefinitionStoreException {
		BeanDefinitionDocumentReader documentReader = createBeanDefinitionDocumentReader();
		int countBefore = getRegistry().getBeanDefinitionCount();
		// 从reader中注册BeanDefinition到工厂
		documentReader.registerBeanDefinitions(doc, createReaderContext(resource));
		return getRegistry().getBeanDefinitionCount() - countBefore;
	}
如果接着往下走就会发现,将输入流中的xml标签解析然后注册BeanDefiniton工厂中
至此我们成功把xml解析成功了,接下来我们回到这里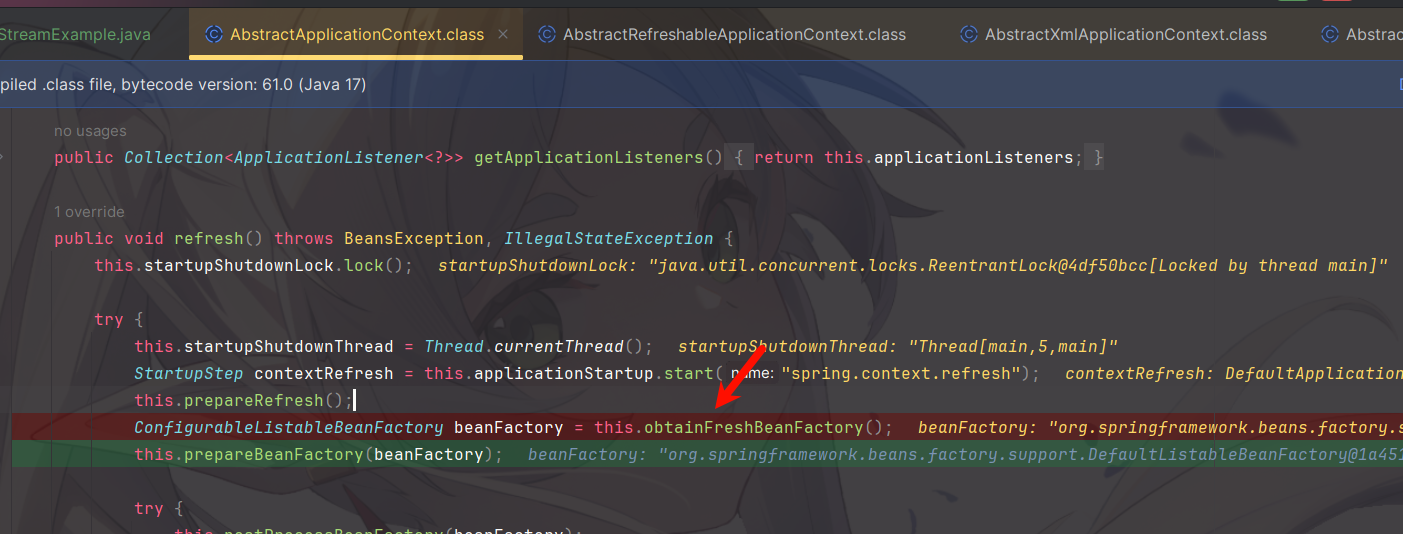
让我们关注这个函数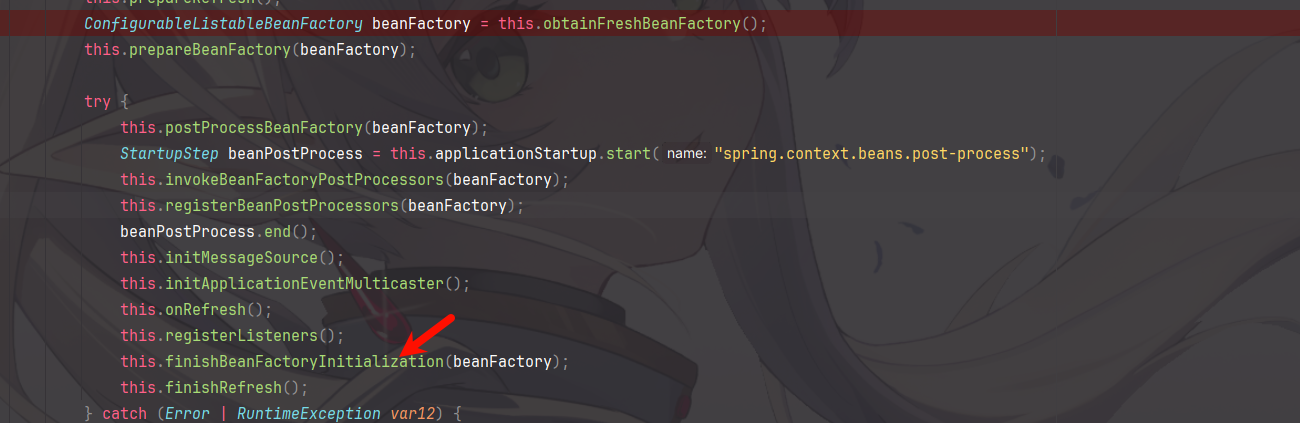
我们关注到这个函数,然后我们关注getBean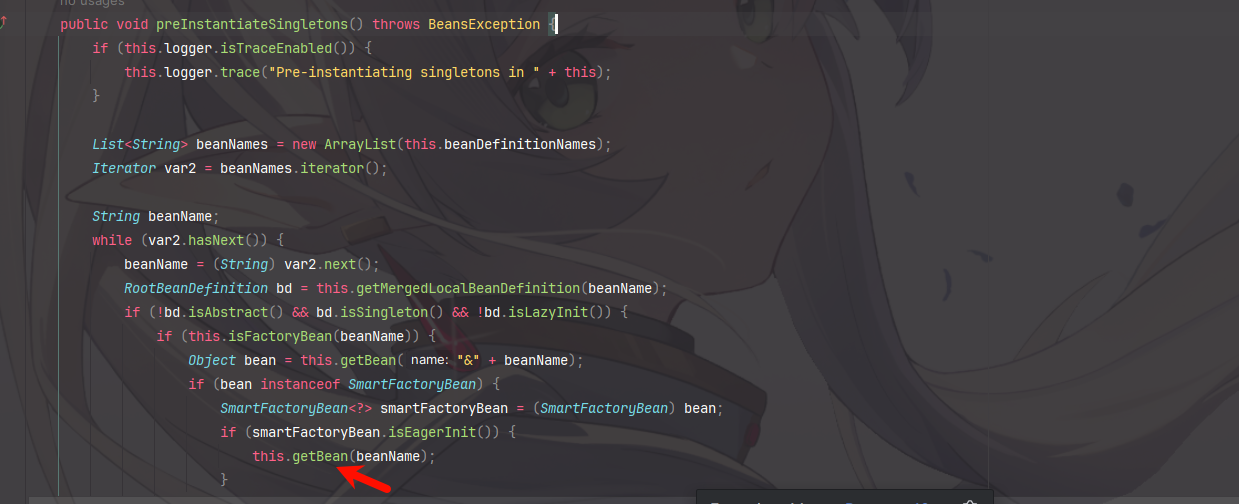
我们第一次进来这里会式null,所以会走下面的逻辑,等后续我们实例代码中使用getBean的时候这里就不为空了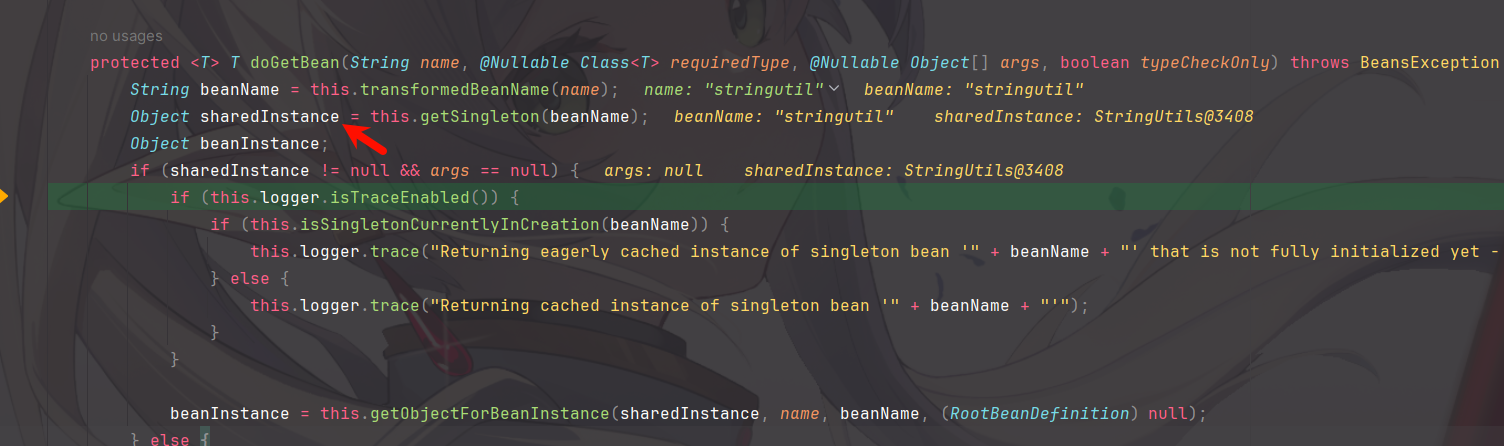
然后下面的else的内容就是使用BeanFactory去创建一个Bean,代码很长,有兴趣可以自己看,我们要关注的是这一段之后的内容
{
			// 首次进来为空  最后会走下边的逻辑
		Object sharedInstance = getSingleton(beanName);
		// 通过this.beanDefinitionMap得到的  具体可自行查看源码。这里不太花篇幅讲述。
		final RootBeanDefinition mbd = getMergedLocalBeanDefinition(beanName);
		//...
		if (mbd.isSingleton()) {
					sharedInstance = getSingleton(beanName, new ObjectFactory<Object>() {
						@Override
						public Object getObject() throws BeansException {
							try {
							 	//最终创建Bean的逻辑
								return createBean(beanName, mbd, args);
							}
							catch (BeansException ex) {
								destroySingleton(beanName);
								throw ex;
							}
						}
					});
					bean = getObjectForBeanInstance(sharedInstance, name, beanName, mbd);
				}
	//....
	// 注意这里,会把单例cache起来,在后边可以直接使用
	if (newSingleton) {
		addSingleton(beanName, singletonObject);
	}

}
在这之后经过一系列的Bean的初始化,然后放入缓存中,就算是大功告成了,最后返回示例代码中的getBean即可从单例缓存中拿到bean !!!
总结

Spring加载Bean的过程为:
- 创建Spring容器
- 读取配置(或者注解),解析内容,封装到BeanDefinition的实现类中(通过registerBeanDefiniton方法来注册到ConcurrentHashMap中,然后将beanName放到list中方便取出)
- 实例化Bean放到Spring容器中
至于一些实例化之类的主要就是BeanPostProcessor了,可以从我的手写rpc项目的文章中找到
Bean的生命周期
- 创建Bean的实例:Bean容器会先找到Bean的定义,然后通过Java反射API来创建Bean的实例
- Bean属性赋值/填充:为Bean设置相关属性和依赖,例如填入@Autowired等注解注入的对象,setter方法和构造函数
- Bean初始化:

- 销毁Bean:把Bean的销毁方法记录下来,将爱需要销毁Bean或者销毁容器时,调用这些方法去释放Bean所持有的资源
- 如果 Bean 实现了
DisposableBean接口,执行destroy()方法。 - 如果 Bean 在配置文件中的定义包含
destroy-method属性,执行指定的 Bean 销毁方法。或者,也可以直接通过@PreDestroy注解标记 Bean 销毁之前执行的方法。
实例化和初始化的区别:
初始化会调用PostConstruct来调用Bean的初始化方法
- 如果 Bean 实现了
循环依赖
循环依赖的详细介绍可以去我的另一篇文章中找到,这里就带大家找到三级缓存的实际位置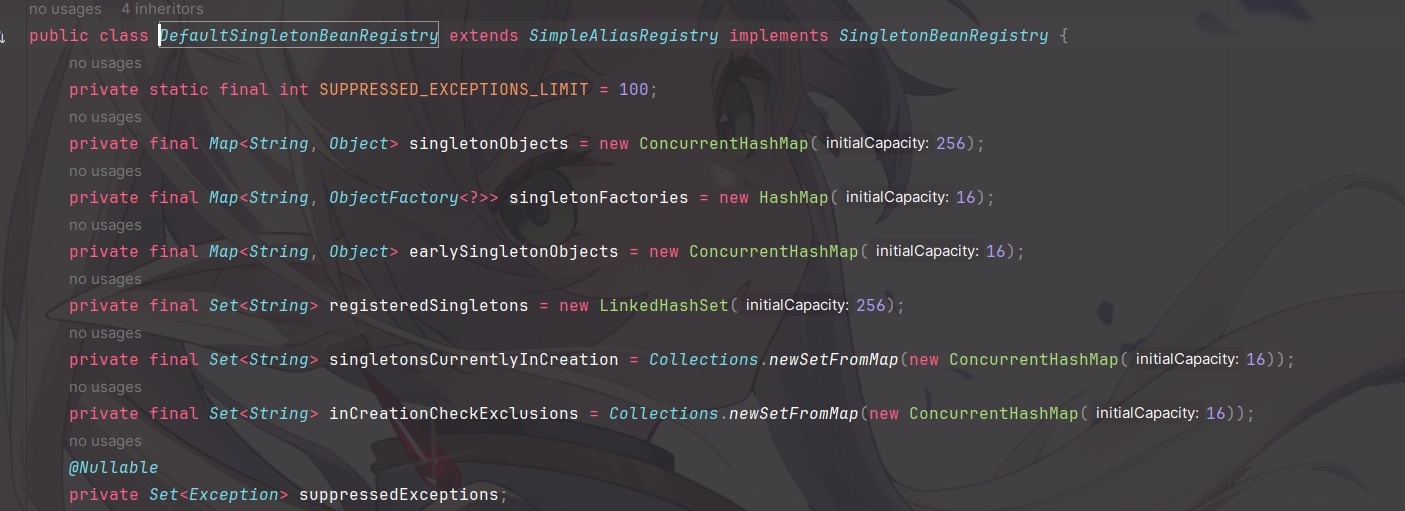
解决流程如下: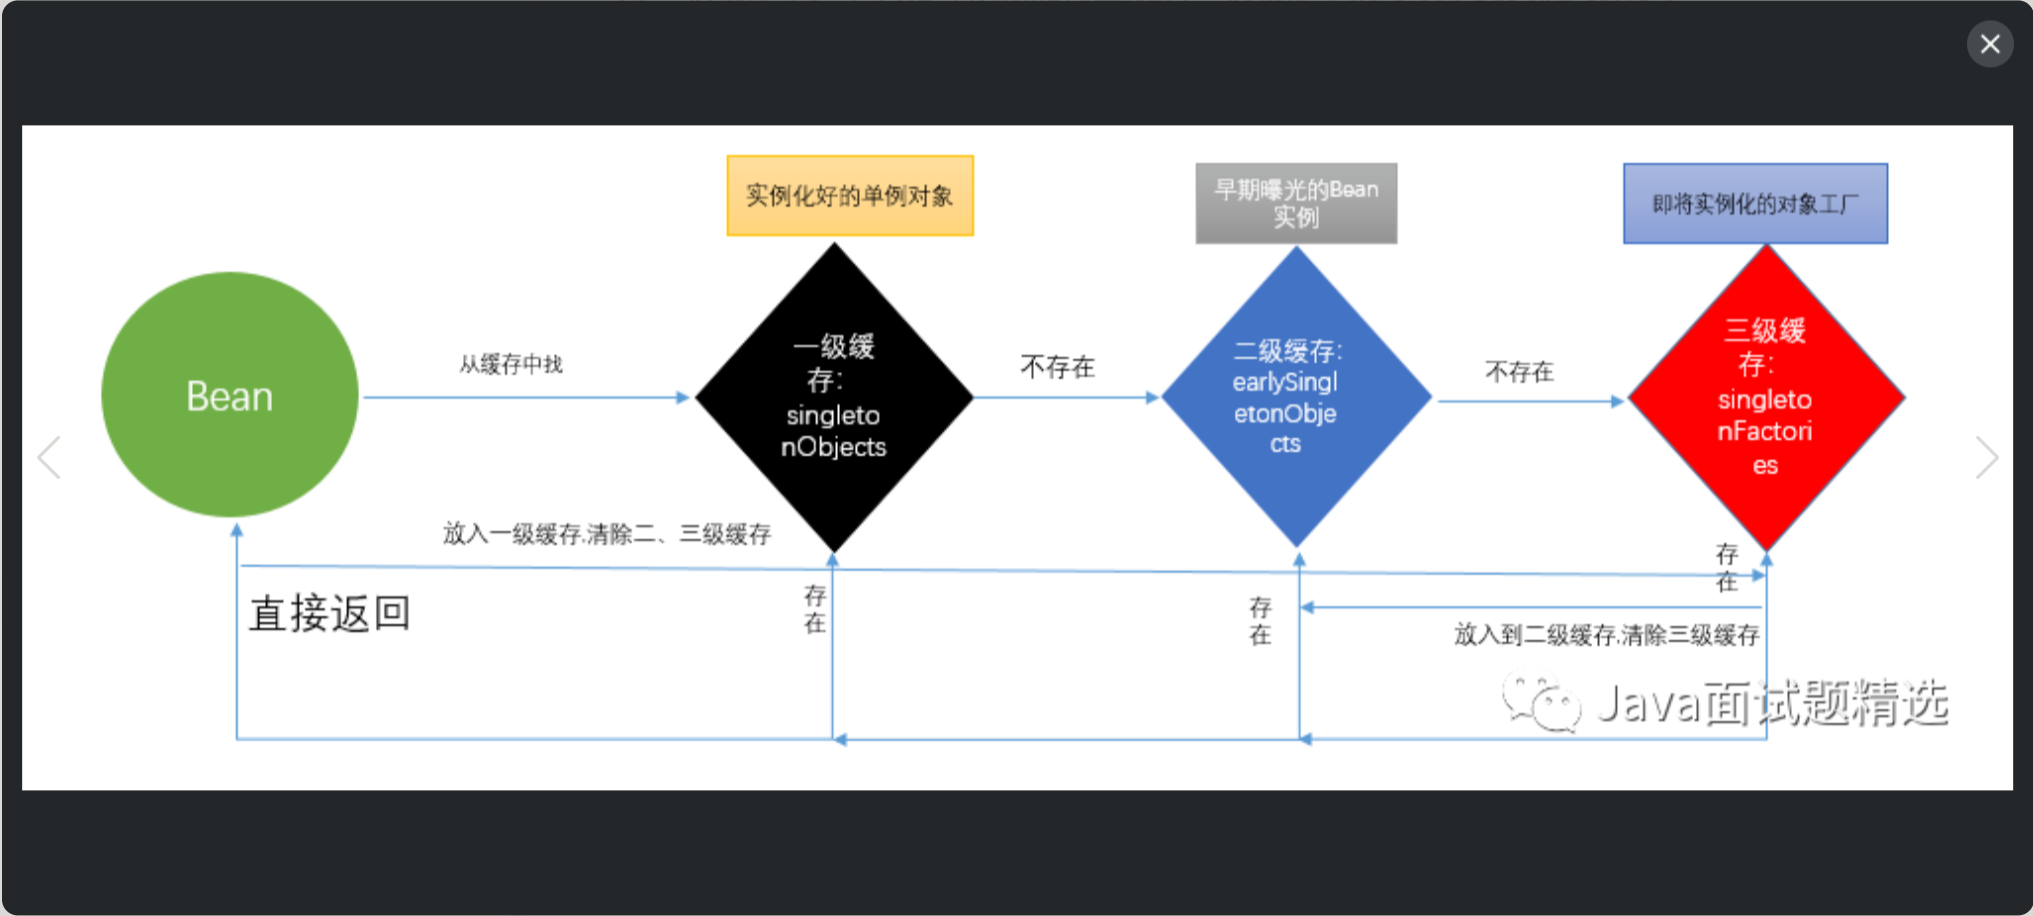
SpringBoot
SpringBoot实际上就是通过自定义注解去标记,然后启动的时候去扫描这些注解来创建Bean,从而替代Spring的xml配置方式,所以这里先略过,后续会单独出一片文章深入探讨SpringBoot,大体介绍一下流程:
- 启动类: 启动类上使用 @SpringBootApplication 注解,包含了 @ComponentScan 和 @EnableAutoConfiguration。
- 自动配置: 通过 @EnableAutoConfiguration 注解加载自动配置类,这些类通常使用 @Conditional 注解来控制 Bean 的创建。
- 组件扫描: 扫描启动类所在包及其子包中的组件(如 @Component, @Service, @Repository, @Controller 等)。
- 条件注解: 根据条件注解的配置,有选择地注册 Bean